The problem of creating preview images for a personalized product is very popular. Sometimes it is not a problem to implement it - for example, when a surface of a product is flat (like a paper sheet). In this case, to create a preview, we just combine a product image with a custom image or design. However, most objects of the physical world have more complex shape.
Please note that this functionality is available in Customer's Canvas — the other product by Aurigma.
Learn more...For example, if you print images on mugs, phone cases, etc, it is not so obvious how to create a preview for such product. There are several approaches to solve the problem which we are going to dwell on below.
Make it flat
The first and simplest one is to draw a product as a two-dimensional image. For example, it may look like this:
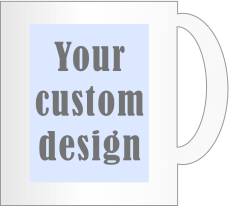
However it is not always possible to do so. Also such preview does not give a real feel of the product. To address this issue, we need to create 3D images.
Build 3D model
The first thing which comes to mind when creating a 3D image is to take some a 3D graphics software (e.g. 3ds Max or similar) and build a 3D model:
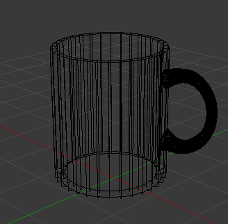
However, there is a problem here - how to use it dynamically in a server scripts (not to mention that 3D modeling requires specific knowledge from designers)?
If you have a decent developer, it is possible to program models in source code without 3D modeling software. It may be a reasonable solution if you only need one model. However, if you sell photo products on your site, you have to create hundreds of 3D models. Taking into consideration cost of software engineers having knowledge in math and skilled enough for solving such problems, the models is going to cost you an arm and a leg leading to ages until you return your investments!
So, we need to find an approach to create 3D models in a more efficient way. Ideally, the tool or technology should be simple enough to be used by folks not claiming to be senior software developers being paid high salaries.
Emulate 3D preview with 2D software
What if we just take a product photo and put a design as an overlay on top? It may look not as realistic as true 3D model but good enough to give the user an idea what personalized product will look like.
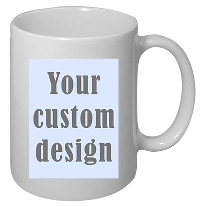
Also, with simple image transformations we can emulate a warp effect.
The question is how to have your designers create such images? You may find it funny but the best tool to build pseudo 3D preview models is… Adobe Photoshop!
Create model preview in Photoshop
Besides many other great features, Photoshop supports so-called Smart Objects. When you associate Smart Object with an image layer, you can do a lot of things, including applying non-linear transformation. The process looks like this:
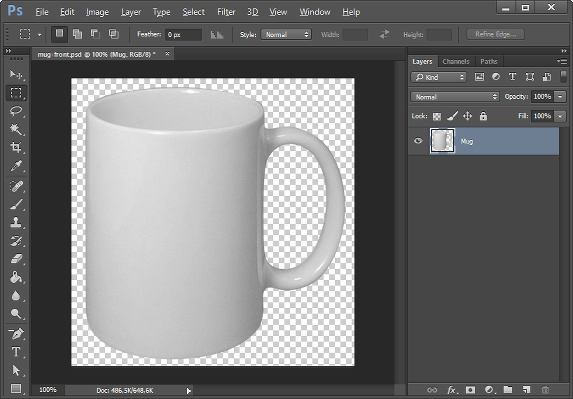
1. You open a product photo you would like to put a design on.
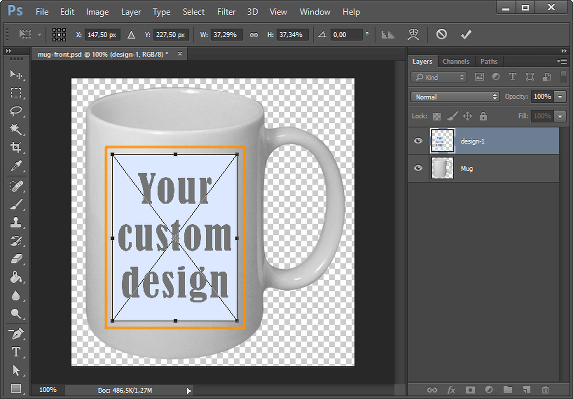
2. Add a placeholder where the design is supposed to be located as a separate layer and adjust its size.
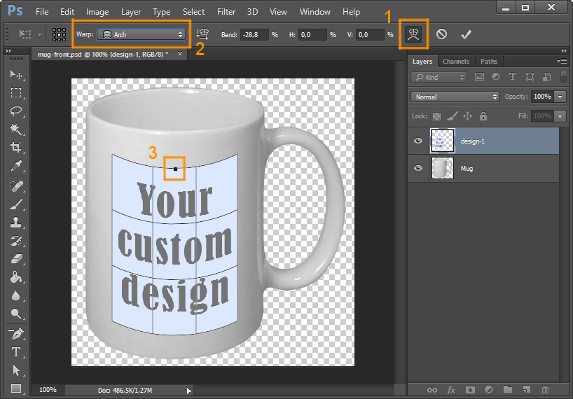
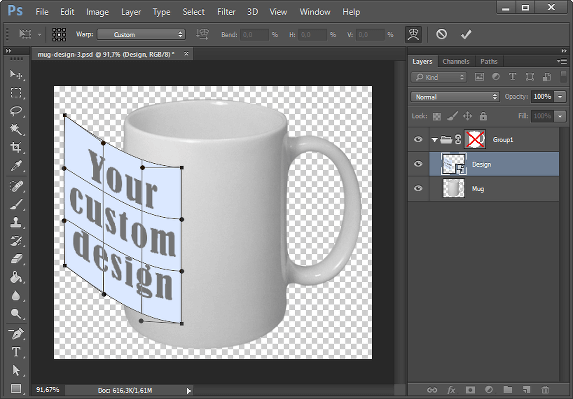
3. Emulate the non-linear surface as follows:
- switch the layer into a warp mode;
- select the Arch warp type;
- drag the control point.
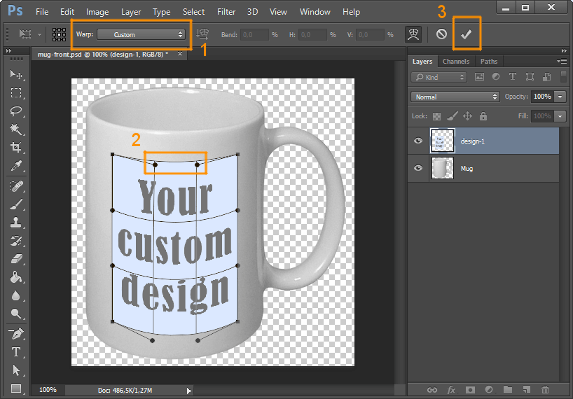
4. It looks pretty close but you may find that you need to fine tune it. You can do it as follows:
- switch the Custom warp type;
- manually adjust surface control points;
- confirm the adjusted warping when you are all set.
The layer which you applied warping to is marked with the Smart Object icon now:
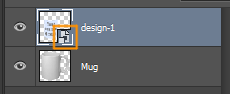
The best thing is that the transformation is not applied to the image. Its settings are saved as Smart Object parameters and if you replace the image, the Smart Object will be applied to this new image and it will be automatically warped!
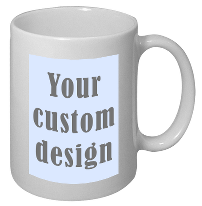
Let’s check this. Right click on Smart Object layer, select Replace Contents… and seleсt new file.
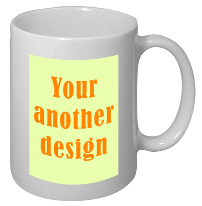
Another image, but the same warping effect!
Download the sample mug-front.psd to play with it.
Process PSD models with Graphics Mill’s PsdProcessor
As you can see, any designer familiar with Photoshop can easily create a model in a couple of minutes. You may wonder how to automate the process of generating these previews? What if you want your customers to upload their own images and see what the mug looks like with them?
Here is where Graphics Mill comes into play.
In the previous post, I introduced the PsdProcessor API which allows to walk through PSD layer structure, personalize its content, and merge layers together.
This API works great with Smart Objects as well. Let’s see how it works.
First of all, let’s see how we can generate an initial preview:
var psdProcessor = new PsdProcessor();
psdProcessor.Render("mug-front.psd", "result.png");
Let’s assume we want to replace our placeholder with an image loaded from design.png. All we need is to add FrameCallback which is called for every frame and, if we find a frame containing a Smart Object named "Design", we just load our design there:
var psdProcessor = new PsdProcessor();

psdProcessor.FrameCallback = (processor, frame) =>
{
 if (frame.Type != FrameType.SmartObject || frame.Name != "Design")
  return processor.ProcessFrame(frame);

 var smartFrame = (PsdSmartFrame)frame;

 return smartFrame.ToGraphicsContainer(ImageReader.Create(@"design.png"),
  ResizeMode.ImageFill);
};

psdProcessor.Render("mug-front.psd", "result.png");
Creating several perspectives with a help of vector mask
Let’s assume that we need to generate several image previews from different angles (i.e. as if a mug is observed from several points of view). In some perspectives a portion of the image becomes invisible (i.e. the image is larger than the visible area).
To handle this, we need to wrap the image around a mug and cut the “invisible” part with a vector mask:
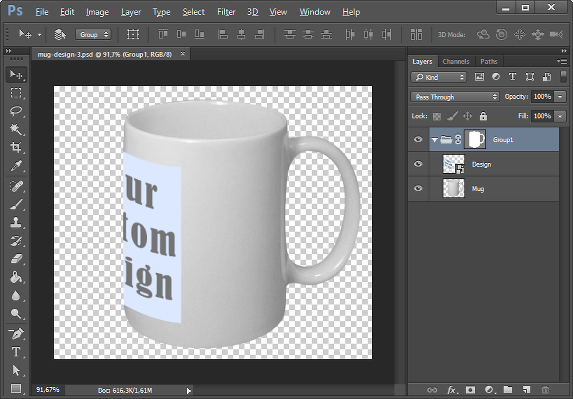
Graphics Mill takes vector masks into consideration when rendering the image.
Download the sample mug-side.psd (with vector mask)
Conclusion
This brief tutorial does not cover all capabilities of the Photoshop and Graphics Mill union. For example, you can add layers to emulate light, create a vector mask to make a variable color, etc. However, it should give you an idea how it is easy to organize personalization of products like mugs, phone cases, t-shirts, etc.
You may wonder if your site have to run under ASP.NET to utilize this technology. Although, Graphics Mill is a .NET library, it is not the only option. We also offer a hosted version where you communicate with Graphics Mill through a REST API. No matter what platform you use, all you need is a JavaScript frontend developer!
If you are interested to learn more about the REST API version, feel free to contact me at info@aurigma.com.