Drawing Text
Using Graphics Mill you can draw various types of text such as plain text, bounded text, distorted text, or artistic text. All these types of text are drawn in Graphics Mill via the Graphics.DrawText(Text) method. If you are not familiar with Graphics, read the Graphics. Drawing Images and Geometric Shapes article. The following image illustrates how each text type looks:

When you create any of these texts you need to specify its colors and font via the Pen, Brush and Font classes. To learn more about pens and brushes, read the Pen and Brush paragraph and the Working with Fonts article, which discusses all the specifics about fonts.
Below we will discuss how to work with each type of text in detail and observe all text options:
Plain Text
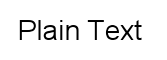
The PlainText class represents plain text. This class allows drawing a specified text string at the specified location on Graphics. Here is the code for drawing plain text:
using (var bitmap = new Bitmap(200, 80, PixelFormat.Format24bppRgb, RgbColor.White))
using (var graphics = bitmap.GetAdvancedGraphics())
{
    var plainText = new PlainText("Plain Text", graphics.CreateFont("Arial", 28), new System.Drawing.PointF(20, 40));
    graphics.DrawText(plainText);
    bitmap.Save(@"Images\Output\out.png");
}
This snippet produces the image containing the horizontal text string as follows:
If you need to locate the string vertically, set the
PlainText.Vertical property to true.
If a specified text string contains \n symbols, the plain text will be divided into lines. However, unlike bounded text,
you cannot put limitations on the width of the plain text. For example, if you need to draw text inside a rectangle, the text can exceed the rectangle's width
and PlainText will not address the overlap automatically.
Thus, bounded text is more appealing for the given example (see below). The following snippet demonstrates how to divide text into lines:
using (var bitmap = new Bitmap(200, 80, PixelFormat.Format24bppRgb, RgbColor.White))
using (var graphics = bitmap.GetAdvancedGraphics())
{
    var plainText = new PlainText("Plain\nText", graphics.CreateFont("Arial", 28), new System.Drawing.PointF(20, 40));
    graphics.DrawText(plainText);
    bitmap.Save(@"Images\Output\out.png");
}
This snippet produces the following result:
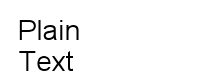
If you want to draw plain text divided into lines vertically, remember that lines will follow from the right to the left. The following snippet demonstrates how to divide text into lines and draw it vertically:
using (var bitmap = new Bitmap(80, 200, PixelFormat.Format24bppRgb, RgbColor.White))
using (var graphics = bitmap.GetAdvancedGraphics())
{
    var plainText = new PlainText("Plain\nText", graphics.CreateFont("Arial", 24), new System.Drawing.PointF(50, 40));
    plainText.Vertical = true;
    graphics.DrawText(plainText);
    bitmap.Save(@"Images\Output\out.png");
}
Here is the result:

Bounded Text
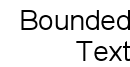
The BoundedText class represents bounded text that is used when you need to locate text inside a specified rectangle. For example, if you want to draw a text paragraph with a specified alignment, BoundedText allows you to perform this with ease. Here is the code for drawing bounded text:
using (var bitmap = new Bitmap(200, 80, PixelFormat.Format24bppRgb, RgbColor.White))
using (var graphics = bitmap.GetAdvancedGraphics())
{
    var boundedText = new BoundedText("Bounded Text", graphics.CreateFont("Arial", 28), new System.Drawing.RectangleF(20, 10, 110, 70));
    graphics.DrawText(boundedText);
    bitmap.Save(@"Images\Output\out.png");
}
This snippet produces the following result:

If the bounded text is longer than the rectangle's width, it is divided into lines; if the text is longer than the rectangle's height, it is clipped.
You also can use the \n symbols to divide text into lines.
The following image illustrates how different texts orient inside the specified rectangle:

By default, bounded text is aligned along the left edge, but you can change that. We will discuss how to work with text options below.
Like PlainText, BoundedText provides the Vertical property that allows locating text vertically in the specified rectangle, wherein lines will be drawn from the right to the left.
Distorted Text
Distorted text is a text string drawn along a vector path. To learn all about paths, read the Working with Paths article. There are two types of distorted text:
- Path text drawn along a single path, that is, the top and bottom lines of the text are aligned to the same path.
- Double path text drawn along two paths, that is, the top and bottom lines of the text are located along two different curves.
Path Text
The PathText class represents a text string located along a curve specified as a vector path. PathText provides the Path property inherited from the AdvancedDrawing.Path class that allows copying an existed path or drawing it from scratch as the Working with Paths article discusses. To draw path text you need to create a PathText class instance specifying a string that will be located on a curve, font characteristics, brush, and a path are defined for the curve. The following snippet illustrates how to create a quadratic Bezier curve and draw text on it:
using (var bitmap = new Bitmap(200, 80, PixelFormat.Format24bppRgb, RgbColor.White))
using (var graphics = bitmap.GetAdvancedGraphics())
using (var path = new Path())
{
    path.MoveTo(10, 60);
    path.CurveTo(85, 20, 175, 60);
    var distortedText = new PathText("Distorted Text", graphics.CreateFont("Arial", 28), new SolidBrush(RgbColor.Black), path);
    graphics.DrawText(distortedText);
    bitmap.Save(@"Images\Output\out.png");
}
Here is the result of this snippet:

Double Path Text
The DoublePathText class represents a text string, the top and bottom lines of which are defined by different curves. The top and bottom lines of DoublePathText are defined by the TopPath and BottomPath properties, respectively. These properties are inherited from the AdvancedDrawing.Path class allowing copying or creating paths as the Working with Paths article discusses. As DoublePathText draws text along two curves, you can chose along which curve the text should be aligned via the MainPath property. By default, the bottom path is the main one. The snippet below demonstrates how to draw double path text:
using (var bitmap = new Bitmap(400, 250, PixelFormat.Format24bppRgb, RgbColor.White))
using (var graphics = bitmap.GetAdvancedGraphics())
using (var doublePathText = new DoublePathText("Double Path Text", graphics.CreateFont("Arial", 36), new SolidBrush(RgbColor.Black)))
{
    doublePathText.ParagraphStyle.Alignment = TextAlignment.Center;
    doublePathText.TopPath.MoveTo(26, 71);
    doublePathText.TopPath.CurveTo(128, 162, 186, 21, 367, 64);
    doublePathText.BottomPath.MoveTo(26, 152);
    doublePathText.BottomPath.CurveTo(121, 177, 183, 68, 368, 157);
    graphics.DrawText(doublePathText);
    bitmap.Save(@"Images\Output\out.png");
}
This snippet produces the following result:
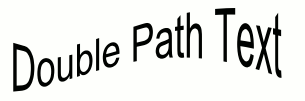
DoublePathText provides the BaseHeight property that changes the text height but preserves its length. For example, the following two images illustrate how BaseHeight affects the text:
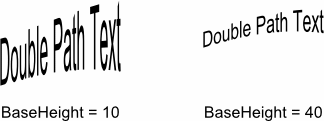
As you may have noticed, the greater the BaseHeight value is, the smaller the text height will be, but keep in mind that the BaseHeight value needs to be more than zero.
Art Text
The Art namespace represents a gallery of text with complex shapes. Using Art you can draw already formatted text, for example, curved, slanted, or rounded. Art provides seven classes representing different formatted text styles. The following table names all these classes, discusses their properties, and illustrates how each text variety looks:
| Class Name | Text View | Properties |
|---|---|---|
| BridgeText |
|
The Bend property indicates how much text will be bended.
The Bend value can be in the range [0; 1], where the more the value is, the more text will be bended.
By default, the Bend value is 0. |
| BulgeText |
|
The Bend property indicates how much text will be bended.
The Bend value can be in the range [0; 1], where the more the value is, the more text will be bended.
By default, the Bend value is 0. |
| PinchText |
|
The Bend property indicates how much text will be bended.
The Bend value can be in the range [0; 1], where the more the value is, the more text will be bended.
By default, the Bend value is 0. |
| RoofText |
|
The Bend property indicates how much text will be bended.
The Bend value can be in the range [-1; 1], where the more the value is, the more text will be bended.
By default, the Bend value is 0. |
| RoundText |
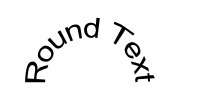
|
The Bend property indicates how much text will be rounded.
The Bend value can be in the range [-1; 1], where the more the value is, the more text will be rounded.
By default, the Bend value is 0. |
| ValleyText |
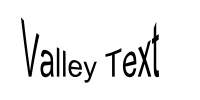
|
The Bend property indicates how much text will be bended.
The Bend value can be in the range [0; 1], where the more the value is, the more text will be bended.
By default, the Bend value is 0. |
| WedgeText |
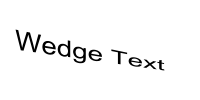
|
The LeftScale property scales the left edge of text. The default value is The RightScale property scales the right edge of text. The default value is The Tilt property is the extent of slanting text.
The more the value is, the more text will be slanted. The default, value is |
For each art text you should specify the Center property defining the location of text. The following snippet illustrates how to create bridge text:
using (var bitmap = new Bitmap(200, 100, PixelFormat.Format24bppRgb, RgbColor.White))
using (var graphics = bitmap.GetAdvancedGraphics())
{
    var artText = new BridgeText("Art Text", graphics.CreateFont("Arial", 28), new SolidBrush(RgbColor.Black), new System.Drawing.PointF(70, 50), 0.5f);
    graphics.DrawText(artText);
    bitmap.Save(@"Images\Output\out.png");
}
Text Options
The Text class, from which all types of text are inherited, provides several text options such as alignment, transformation, and effects.
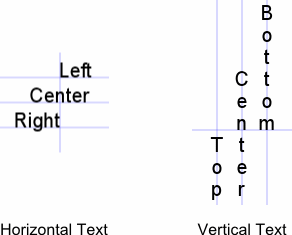
Alignment
All types of text, with the exception of ArtText, can be aligned via the Alignment property. There are six types of TextAlignment:
- Left
- Right
- Top
- Bottom
- Center
- Justification
Note, that the Right and Left values affect horizontal text,
whereas the Top and Bottom values affect vertical text. You can apply the Center and Justification values to both horizontal and vertical text. The following picture demonstrate how all the alignment settings work:
Alignment of each text is performed relatively to its location: PlainText is aligned relatively to the Position point, BoundedText is aligned relatively to the specified Rectangle, PathText and DoublePathText are aligned relatively to Path and MainPath, respectively.
The following snippet demonstrates how you can align BoundedText along the right edge:
using (var bitmap = new Bitmap(130, 100, PixelFormat.Format24bppRgb, RgbColor.White))
using (var graphics = bitmap.GetAdvancedGraphics())
{
    var boundedText = new BoundedText("Bounded Text", graphics.CreateFont("Arial", 28), new System.Drawing.RectangleF(20, 10, 110, 90));
    boundedText.ParagraphStyle.Alignment = TextAlignment.Right;
    graphics.DrawText(boundedText);
    bitmap.Save(@"Images\Output\out.png");
}
Here is the result of this snippet:
Text Transforming
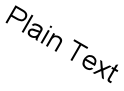
All types of text can be transformed by a transformation matrix performing a geometric transform such as rotating, scaling, translating, etc. This matrix is represented as the Matrix class specified via the Transform property. For example, the following rotated text can be produced with the code below:
using (var bitmap = new Bitmap(150, 150, PixelFormat.Format24bppRgb, RgbColor.White))
using (var graphics = bitmap.GetAdvancedGraphics())
using (var m = new System.Drawing.Drawing2D.Matrix())
{
    m.Rotate(30);
    var plainText = new PlainText("Plain Text", graphics.CreateFont("Arial", 28), new System.Drawing.PointF(40, 40));
    plainText.Transform = m;
    graphics.DrawText(plainText);
    bitmap.Save(@"Images\Output\out.png");
}
Text Effects
Using the Pen and Brush properties
you can change the colors of text (to learn more about pens and brushes read the Graphics. Drawing Images and Geometric Shapes article).
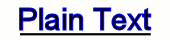
You can also underline plain text and bounded text by setting the Underline property to true.
For example, the following snippet demonstrates how to fill text with blue and underline it:
using (var bitmap = new Bitmap(170, 40, PixelFormat.Format24bppRgb, RgbColor.White))
using (var graphics = bitmap.GetAdvancedGraphics())
{
    var plainText = new PlainText("Plain Text", graphics.CreateFont("Arial", 30), new System.Drawing.PointF(20, 30));
    plainText.Pen = new Pen(RgbColor.Blue);
    plainText.Brush = new SolidBrush(RgbColor.Black);
    plainText.Underline = true;
    graphics.DrawText(plainText);
    bitmap.Save(@"Images\Output\out.png");
}
Here is the result:
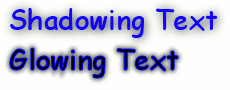
Graphics Mill provides such complex effects as glowing and shadowing. These effects are represented by the Effects.Glow and Effects.Shadow classes. If you want to make text glow you can specify the Color, Size and Opacity of glowing; when shadowing text you can handle its Color, Size, offsets of shadow (OffsetX and OffsetY), and Opacity. To make text glow or create its shadow set the Effect property to one of these classes as the following snippet shows:
using (var bitmap = new Bitmap(230, 90, PixelFormat.Format24bppRgb, RgbColor.White))
using (var graphics = bitmap.GetAdvancedGraphics())
{
    using (var shadowingText = new PlainText("Shadowing Text", graphics.CreateFont("Comic", 28)))
    {
        shadowingText.Position = new System.Drawing.PointF(10, 30);
        shadowingText.Brush = new SolidBrush(RgbColor.Blue);
        shadowingText.Effect = new Shadow(RgbColor.Black, 5, 1, 1, 0.9f);
        graphics.DrawText(shadowingText);
    }
    using (var glowingText = new PlainText("Glowing Text", graphics.CreateFont("Comic", 28)))
    {
        glowingText.Position = new System.Drawing.PointF(10, 70);
        glowingText.Pen = new Pen(RgbColor.Blue);
        glowingText.Effect = new Glow(RgbColor.Black, 5, 0.5f);
        graphics.DrawText(glowingText);
    }
    bitmap.Save(@"Images\Output\out.png");
}
This snippet produces the following result:
See Also
Reference
- Aurigma.GraphicsMill.AdvancedDrawing Namespace
- Graphics Class
- Text Class
- PlainText Class
- BoundedText Class
- Art Namespace
- Path Class
- Effects Namespace