Creating Artistic Thumbnails
Extracting thumbnails from the images is an important task when we create a file browser or similar software. However to make these thumbnails look unusual and attractive extra processing is necessary. This article discusses how Graphics Mill for .NET can be used to apply artistic effects to thumbnails.
This article only illustrates applying effects to thumbnails. The details about most efficient thumbnail extraction are discussed separately.
Here only 6 ways of decorating the thumbnails are discussed. Of course, you can combine these methods or create your own ones.
Vignette
Let's assume that you may want to add a vignette on the thumbnail like on the image below.
There is a separate topic about adding vignettes to images which contains more samples for it. One of the vignette drawing code is adduced below.
'Define scale factor
Dim scale As Single = 0.5

'Calculate new size and resize image
bitmap.Transforms.Resize(bitmap.Width * scale, 0)

'Create border

'The "button" shape is a rectangle.
bitmap.Transforms.Buttonize(10)
//Define scale factor
const float scale = 0.5f;

//Calculate new size and resize image
bitmap.Transforms.Resize(bitmap.Width * scale, 0);

//Create border

//The "button" shape is a rectangle.
bitmap.Transforms.Buttonize(10);
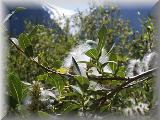
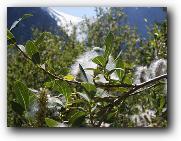
Feathered Edges
Another kind of artistic borders are the sprayed edges:
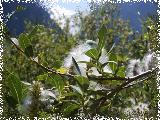
It can be done using Spray transform. Here is a code example:
'Define scale factor
Dim scale As Single = 0.5

'Calculate new size and resize image
bitmap.Transforms.Resize(bitmap.Width * scale, 0)

'Create sprayed border with width = 12
bitmap.Transforms.Spray(20, 12, Aurigma.GraphicsMill.Transforms.FadeType.Linear, _
 0, Aurigma.GraphicsMill.RgbColor.White)
//Define scale factor
const float scale = 0.5f;

//Calculate new size and resize image
bitmap.Transforms.Resize(bitmap.Width * scale, 0);

//Create sprayed border with width = 12
bitmap.Transforms.Spray(20, 12, Aurigma.GraphicsMill.Transforms.FadeType.Linear,
    0, Aurigma.GraphicsMill.RgbColor.White);
Artistic Frame and Text
You can also create more complex borders on thumbnails. Use GdiGraphics class instance to draw any border you can imagine. This image and the code below demonstrate an example of such advanced border.

'Define scale factor
Dim scale As Single = 0.5

'Calculate new size and resize image
bitmap.Transforms.Resize(bitmap.Width * scale, 0)

'Size of corner box
Dim a As Integer = 5
'Margin of corner box
Dim b As Integer = 1
'Height of bottom panel
Dim c As Integer = 14

Dim graphics As System.Drawing.Graphics = bitmap.GetGdiplusGraphics()

'Draw bottom panel
'Note that we use ARGB color model, it means that &h80D0D0FF
'defines RGB color &hD0D0FF with opacity = &h80 (half-transparent)
graphics.FillRectangle(New System.Drawing.SolidBrush( _
 System.Drawing.Color.FromArgb(&H80D0D0FF)), _
 0, bitmap.Height - c, bitmap.Width, c)

Dim p As New System.Drawing.Pen(System.Drawing.Color.FromArgb(&H50D0D0FF))
For I As Integer = bitmap.Height - c + 2 To bitmap.Height Step 2
    graphics.DrawLine(p, 0, I, bitmap.Width - 1, I)
Next

''Draw text
Dim fb As New System.Drawing.SolidBrush(System.Drawing.Color.FromArgb(&HC0000080))
Dim f As New System.Drawing.Font("Verdana", 10, FontStyle.Bold)
Dim sf As New System.Drawing.StringFormat( _
 System.Drawing.StringFormatFlags.DirectionRightToLeft)
sf.Alignment = StringAlignment.Center
        graphics.DrawString("Watermark", f, fb, _
 bitmap.Width \ 2 + 1, bitmap.Height - c, sf)

''Draw frame
Dim points(12) As Point
points(0).X = a - 1
points(0).Y = 0

points(1).X = bitmap.Width - a
points(1).Y = 0

points(2).X = bitmap.Width - a
points(2).Y = a - 1

points(3).X = bitmap.Width - 1
points(3).Y = a - 1

points(4).X = bitmap.Width - 1
points(4).Y = bitmap.Height - a

points(5).X = bitmap.Width - a
points(5).Y = bitmap.Height - a

points(6).X = bitmap.Width - a
points(6).Y = bitmap.Height - 1

points(7).X = a - 1
points(7).Y = bitmap.Height - 1

points(8).X = a - 1
points(8).Y = bitmap.Height - a

points(9).X = 0
points(9).Y = bitmap.Height - a

points(10).X = 0
points(10).Y = a - 1

points(11).X = a - 1
points(11).Y = a - 1

points(12).X = a - 1
points(12).Y = 0

graphics.DrawLines(p, points)

''Draw white boxes in the corners of picture
Dim sb As New System.Drawing.SolidBrush(System.Drawing.Color.White)
graphics.FillRectangle(sb, 0, 0, a - 1, a - 1)
graphics.FillRectangle(sb, bitmap.Width - a + 1, 0, a - 1, a - 1)
graphics.FillRectangle(sb, 0, bitmap.Height - a + 1, a - 1, a - 1)
graphics.FillRectangle(sb, bitmap.Width - a + 1, bitmap.Height - a + 1, a - 1, a - 1)

''Draw points in the center of corners box
sb = New System.Drawing.SolidBrush(System.Drawing.Color.FromArgb(&HFFA0A0FF))
graphics.FillRectangle(sb, b, b, a - 2 * b - 1, a - 2 * b - 1)
graphics.FillRectangle(sb, bitmap.Width - a + 1 + b, b, a - 2 * b - 1, a - 2 * b - 1)
graphics.FillRectangle(sb, b, bitmap.Height - a + 1 + b, a - 2 * b - 1, a - 2 * b - 1)
graphics.FillRectangle(sb, bitmap.Width - a + 1 + b, _
 bitmap.Height - a + 1 + b, a - 2 * b - 1, a - 2 * b - 1)
//Define scale factor
const float scale = 0.5f;

//Calculate new size and resize image
bitmap.Transforms.Resize(bitmap.Width * scale, 0);

//Size of corner box
int a = 5;
//Margin of corner box
int b = 1;
//Height of bottom panel
int c = 14;

System.Drawing.Graphics graphics = bitmap.GetGdiplusGraphics();

//Draw bottom panel
//Note that we use ARGB color model, it means that &h80D0D0FF
//defines RGB color &hD0D0FF with opacity = &h80 (half-transparent)
graphics.FillRectangle(new System.Drawing.SolidBrush(
    System.Drawing.Color.FromArgb(0x80, 0xD0, 0xD0, 0xFF)),
    0, bitmap.Height - c, bitmap.Width, c);

System.Drawing.Pen p = new Pen(System.Drawing.Color.FromArgb(0x50D0D0FF));
for (int I = bitmap.Height - c + 2; I<=bitmap.Height; I+=2)
{
    graphics.DrawLine(p, 0, I, bitmap.Width - 1, I);
}

//Draw text
System.Drawing.SolidBrush fb = new System.Drawing.SolidBrush(
    System.Drawing.Color.FromArgb(0xC0, 0x00, 0x00, 0x80));
System.Drawing.Font f = new System.Drawing.Font(
    "Verdana", 10, FontStyle.Bold);
System.Drawing.StringFormat sf = new System.Drawing.StringFormat(
    System.Drawing.StringFormatFlags.DirectionRightToLeft);
sf.Alignment = StringAlignment.Center;
graphics.DrawString("Watermark", f, fb,
    bitmap.Width / 2 + 1, bitmap.Height - c, sf);

//Draw frame
Point[] points = new Point[13];
points[0].X = a - 1;
points[0].Y = 0;

points[1].X = bitmap.Width - a;
points[1].Y = 0;

points[2].X = bitmap.Width - a;
points[2].Y = a - 1;

points[3].X = bitmap.Width - 1;
points[3].Y = a - 1;

points[4].X = bitmap.Width - 1;
points[4].Y = bitmap.Height - a;

points[5].X = bitmap.Width - a;
points[5].Y = bitmap.Height - a;

points[6].X = bitmap.Width - a;
points[6].Y = bitmap.Height - 1;

points[7].X = a - 1;
points[7].Y = bitmap.Height - 1;

points[8].X = a - 1;
points[8].Y = bitmap.Height - a;

points[9].X = 0;
points[9].Y = bitmap.Height - a;

points[10].X = 0;
points[10].Y = a - 1;

points[11].X = a - 1;
points[11].Y = a - 1;

points[12].X = a - 1;
points[12].Y = 0;

graphics.DrawLines(p, points);

//Draw white boxes in the corners of picture
System.Drawing.SolidBrush sb =
    new System.Drawing.SolidBrush(System.Drawing.Color.White);
graphics.FillRectangle(sb, 0, 0, a - 1, a - 1);
graphics.FillRectangle(sb, bitmap.Width - a + 1, 0, a - 1, a - 1);
graphics.FillRectangle(sb, 0, bitmap.Height - a + 1, a - 1, a - 1);
graphics.FillRectangle(sb, bitmap.Width - a + 1, bitmap.Height - a + 1, a - 1, a - 1);

//Draw points in the center of corners box
sb = new System.Drawing.SolidBrush(System.Drawing.Color.FromArgb(0xFF, 0xA0, 0xA0, 0xFF));
graphics.FillRectangle(sb, b, b, a - 2 * b - 1, a - 2 * b - 1);
graphics.FillRectangle(sb, bitmap.Width - a + 1 + b, b, a - 2 * b - 1, a - 2 * b - 1);
graphics.FillRectangle(sb, b, bitmap.Height - a + 1 + b, a - 2 * b - 1, a - 2 * b - 1);
graphics.FillRectangle(sb, bitmap.Width - a + 1 + b,
    bitmap.Height - a + 1 + b, a - 2 * b - 1, a - 2 * b - 1);
Drop Shadow
Using artistic borders is not the only way of decorating thumbnails. For example, you can make the thumbnail cast a shadow like on the image below.
The shadow can be added with a Spray transform. Use the following code to do it:
'Define scale factor
Dim scale As Single = 0.5

'Calculate new size and resize image
bitmap.Transforms.Resize(bitmap.Width * scale, 0)

'Convert to format with alpha channel
If Not bitmap.HasAlpha Then
    bitmap.Channels.AddAlpha(1)
End If

bitmap.Transforms.Shadow(Aurigma.GraphicsMill.RgbColor.Black, 4, 4, 10, True)

'Flatten alpha channel
bitmap.Channels.DiscardAlpha(Aurigma.GraphicsMill.RgbColor.White)
//Define scale factor
const float scale = 0.5f;

//Calculate new size and resize image
bitmap.Transforms.Resize(bitmap.Width * scale, 0);

//Convert to format with alpha channel
if (!bitmap.HasAlpha)
{
    bitmap.Channels.AddAlpha(1);
}

bitmap.Transforms.Shadow(Aurigma.GraphicsMill.RgbColor.Black, 4, 4, 10, true);

//Flatten alpha channel
bitmap.Channels.DiscardAlpha(Aurigma.GraphicsMill.RgbColor.White);
Glow Borders
Instead of the shadow you can add a glow effect:
The glow is added with a Glow transform. Use this code to add glow around the thumbnails:
'Define scale factor
Dim scale As Single = 0.5

'Calculate new size and resize image
bitmap.Transforms.Resize(bitmap.Width * scale, 0)

'Convert to format with alpha channel
If Not bitmap.HasAlpha Then
    bitmap.Channels.AddAlpha(1)
End If

bitmap.Transforms.Glow(Aurigma.GraphicsMill.RgbColor.Blue, 1, 8, True)

'Flatten alpha channel
bitmap.Channels.DiscardAlpha(Aurigma.GraphicsMill.RgbColor.White)
//Define scale factor
const float scale = 0.5f;

//Calculate new size and resize image
bitmap.Transforms.Resize(bitmap.Width * scale, 0);

//Convert to format with alpha channel
if (!bitmap.HasAlpha)
{
    bitmap.Channels.AddAlpha(1);
}

bitmap.Transforms.Glow(Aurigma.GraphicsMill.RgbColor.Blue, 1, 8, true);

//Flatten alpha channel
bitmap.Channels.DiscardAlpha(Aurigma.GraphicsMill.RgbColor.White);
Effect of Curled Corner
In conclusion let's examine how to add an effect of a curled page. This effect can be used not only as a decoration, but also it may identify an active or selected image (instead of the radio button or the checkbox).

To make the thumbnail curled, use PageCurl transform as shown at this code example:
'Define scale factor
Dim scale As Single = 0.5

'Calculate new size and resize image
bitmap.Transforms.Resize(bitmap.Width * scale, 0)

'Convert to format with alpha channel
If Not bitmap.HasAlpha Then
    bitmap.Channels.AddAlpha(1)
End If

bitmap.Transforms.PageCurl(50, 50, Aurigma.GraphicsMill.Transforms.Direction.DownRight, _
 Aurigma.GraphicsMill.Transforms.Orientation.Vertical, _
 Aurigma.GraphicsMill.RgbColor.FromRgb(140, 140, 140), _
 Aurigma.GraphicsMill.RgbColor.White)

'Flatten alpha channel
bitmap.Channels.DiscardAlpha(Aurigma.GraphicsMill.RgbColor.White)
//Define scale factor
const float scale = 0.5f;

//Calculate new size and resize image
bitmap.Transforms.Resize(bitmap.Width * scale, 0);

//Convert to format with alpha channel
if (!bitmap.HasAlpha)
{
    bitmap.Channels.AddAlpha(1);
}

bitmap.Transforms.PageCurl(50, 50, Aurigma.GraphicsMill.Transforms.Direction.DownRight,
    Aurigma.GraphicsMill.Transforms.Orientation.Vertical,
    Aurigma.GraphicsMill.RgbColor.FromRgb(140, 140, 140),
    Aurigma.GraphicsMill.RgbColor.White);

//Flatten alpha channel
bitmap.Channels.DiscardAlpha(Aurigma.GraphicsMill.RgbColor.White);